
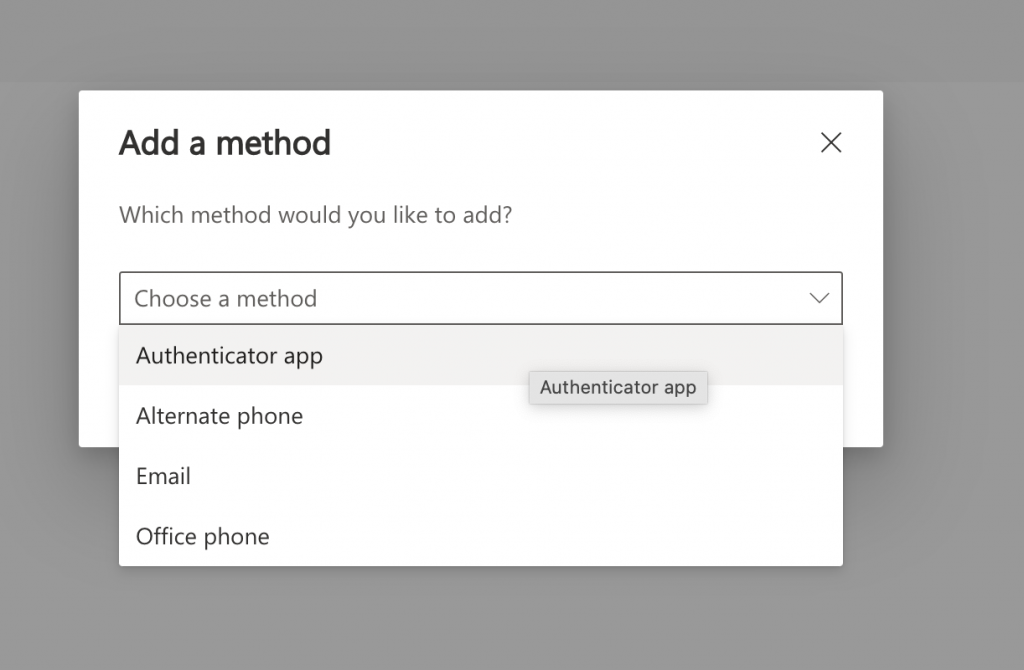
1) Click the Add Method button at the top.
2) Select Authenticator App
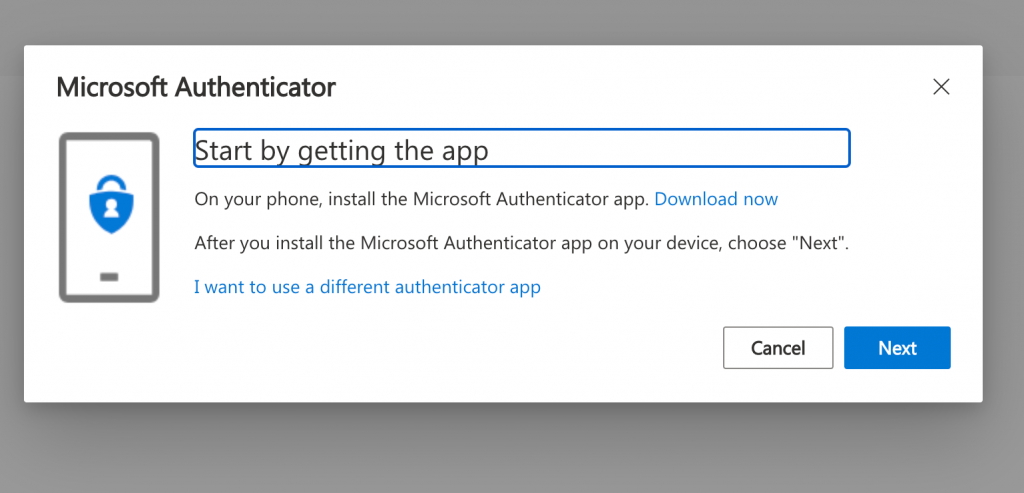
3) Download the Microsoft Authenticator App to your phone. You can get it by searching for it in the App Store, or click the Download Now button from your device. You can also click here for a link. Lastly you can visit https://aka.ms/authapp on your phone to get the app.
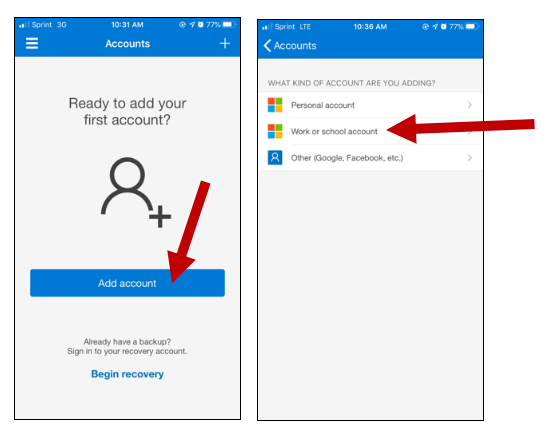
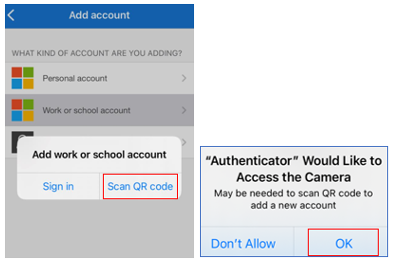
4) Once installed, open the Microsoft Authenticator app. Choose Add Account and then select Work or School.
5) Choose Scan QR code. The app may prompt you to allow access to the camera.
6) Your computer will show a screen similar to this one. Scan the QR code shown on your screen by holding the phone up to your screen and getting the QR code in the center of the camera view.
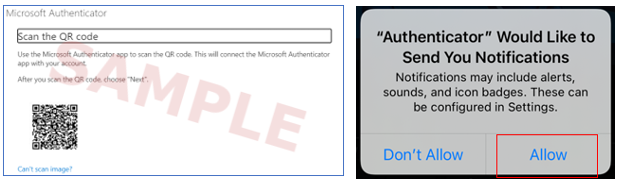
7) After scanning the QR code a test notification will be sent to your mobile device to verify it is working properly.
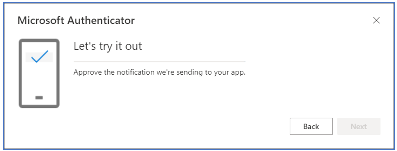
Select Approve on your mobile device to complete the test. Then select Next on your desktop/laptop computer to complete registering the Microsoft Authenticator app with your POOLCORP account.

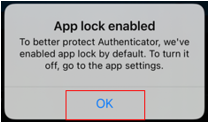
8) Some users may receive the following notification. Please push OK.
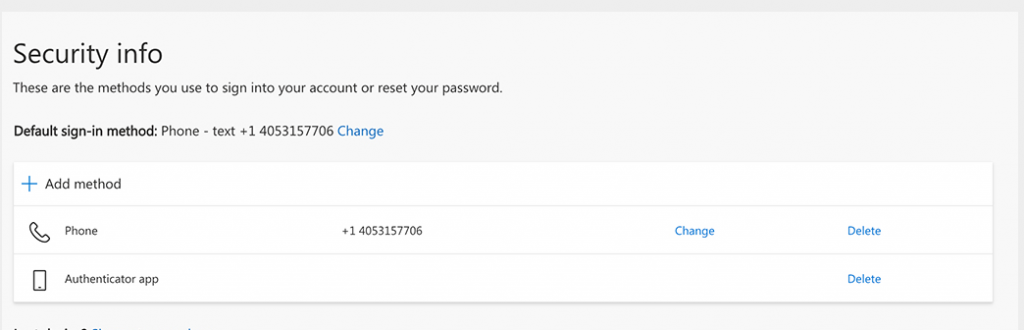
8) Lastly, back on the computer you need to make sure your new device is set as the default device. There may be some cases where you have multiple, or have registered a phone number previously. Please go back to the security info page, where we began this process. Click here or visit https://aka.ms/mysecurityinfo.
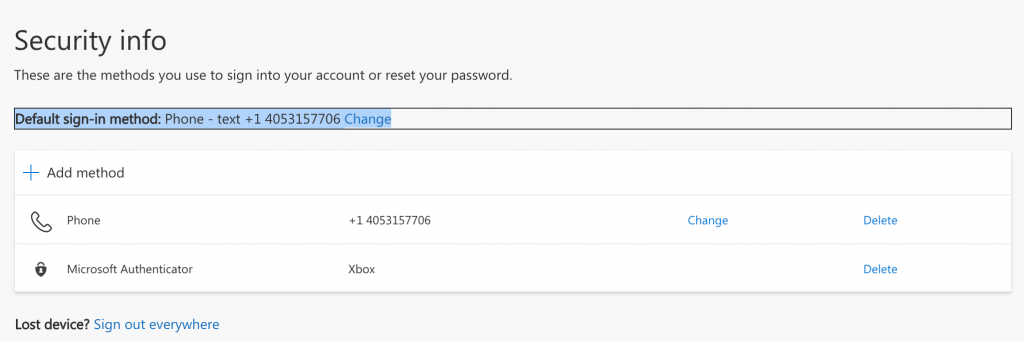
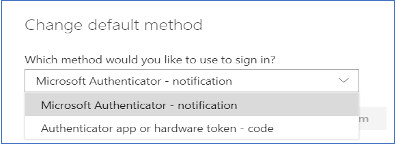
9) On this screen where it says “Default sign-in method:” Change, choose change and select the new authenticator app you just set up.
You have now completed enrollment and have selected Microsoft Authenticator as your default device.